Creating Your Own Basic Thriftly APIs
Now that you’ve examined our example application and APIs, we’ll walk you through creating your own simple application that includes two Thriftly APIs. These APIs, built from Java services, will return strings, shorts, boolean values, and lists. One service will operate on primitive data types, and the other will operate on arrays.
To get started, we’ll create a new Java application.
Creating Your Application
Note
Throughout the rest of this section, we’ll be using Eclipse for Java to create and manage a Java application. We highly recomend installing and using Eclipse Java to create your Thriftly APIs, as it simplifies the process of creating and managing Java applications.
If you don’t already have it open, launch Eclipse Java.
From the Eclipse toolbar, select File > New > Java Project.
The New Java Project window appears. In the Project Name: field, enter a name for your project, such as ThriftlyJavaExampleAPIs.
In the JRE section, confirm that your project is using the 32-bit version of JRE.
Select Finish. Your new project appears in the Package Explorer sidebar.
Now, you must import the Thriftly libraries that allow you to connect a Java application to the Thriftly Server. To import the Thriftly libraries:
Right-click your project in the Package Explorer sidebar and select Import.
The Import window appears. From the list of potential import folders, select General > File System. Then, select the Next button.
Select the Browse button that appears to the right of the From directory: field. In the Import from directory window, select This PC > Local Disk (C:) > Program Files (x86) > Thriftly Developer > bin. After you have the bin folder selected, select the OK button.
The bin folder appears in the Import window, along with a list of the files it contains. From the list of files, select Thriftly.Java.dll, Thriftly.Java.jar, and Thriftly.Java.Resources.dll. These are the Thriftly libraries that you must import into your application.
In the Into folder: field, append \lib to the end of your application’s name. This will create a new folder within your application to hold the imported Thriftly libraries.
Select the Finish button to import the libraries.
Expand your project’s filetree in the Package Explorer. The lib folder appears there, containing the three imported Thriftly libraries.

Now, you must configure your app to reference these imported libraries. To do so:
Right-click your project in the Package Explorer sidebar and select Build Path > Configure Build Path.
The Properties window appears. From the Source tab, select and expand your project. Then, double-click Native library location: (None).
The Native Library Folder Configuration window appears. Select the Workspace button. When the Native Library Folder selection window appears, select your lib folder, then select OK.
Select OK from within the Native Library Folder Configuration window.
From the Properties window, select the Libraries tab. Then, select the Add JARs button. The JAR Selection window appears.
Select and expand your project, then expand the lib folder. Select Thriftly.Java.jar, then select OK.
Select Apply and Close from within the Properties window to confirm your selections and close the window.
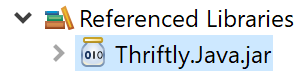
Within your project’s filetree, the Referenced Libraries section now appears, containing Thriftly.Java.jar.
Finally, we’ll create the Main.java file for your application. Right-click your project in the Package Explorer sidebar and select New > Class. The New Java Class window appears.
In the New Java Class window, make the following entries and selections:
In the Package: field, enter ExampleJavaThriftlyAPIs.
In the Name: field, enter Main.
Select the public static void main(String[]args) checkbox.
Select Finish. Your Main.java file appears in Eclipse.
Now that you have your project and your Main.java file ready, you must modify your Main.java file to:
Include the import thriftly.java.ThriftlyServer directive.

Create a Thriftly Server object.

Call the services we’ll create and define in the next set of steps.

Send the StartServer command to the ThriftlyServer object.

Basically, you need to modify your project’s Main.java file so it reads like the code below.
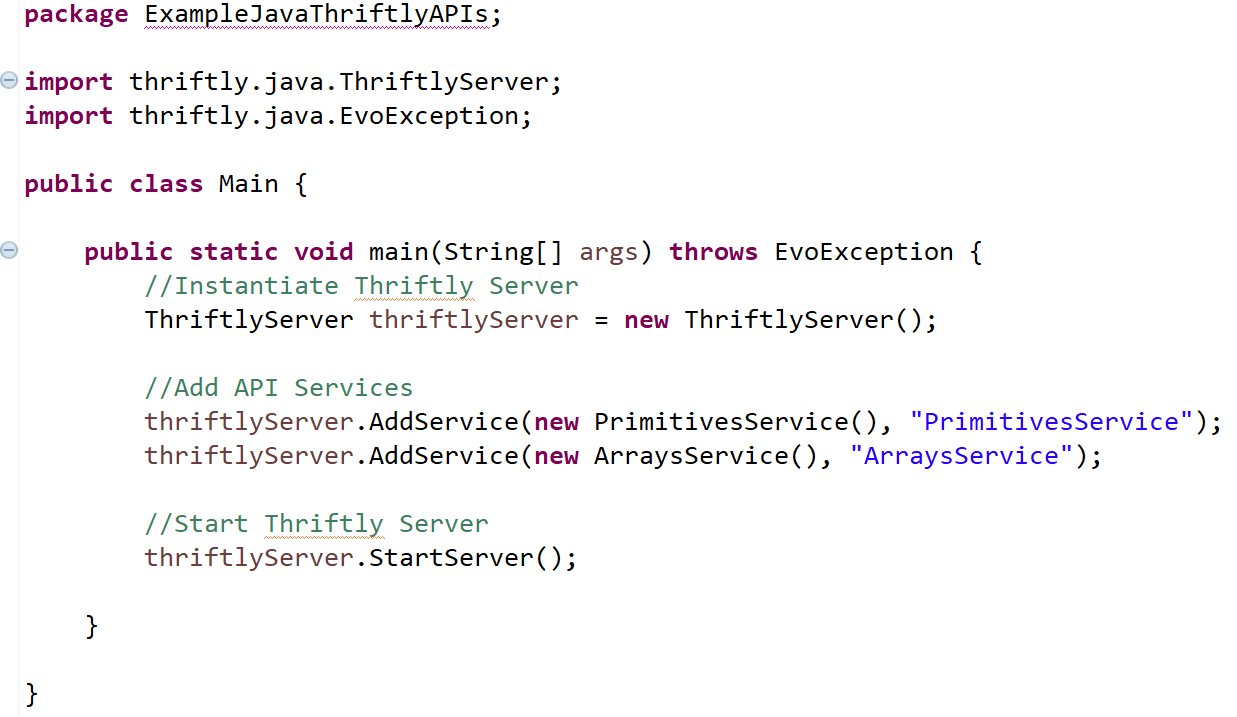
Be sure to examine this code as you integrate it into your project, rather than mindlessly copying it over. This code shows you how to connect an app to the Thriftly Server (which lets you access your APIs) and how to call the services that define your APIs. You’ll create these services in the next set of setup steps.
Creating the Services That Define Your APIs
You’ll now create the two services that define your APIs. As you create these services, note the thriftly.java attributes you import and how you use them within the service. These two attributes, @PublishedAttribute and @ParametersName, define what functions are published to the Thriftly Server as APIs and how those functions’ parameters are displayed.
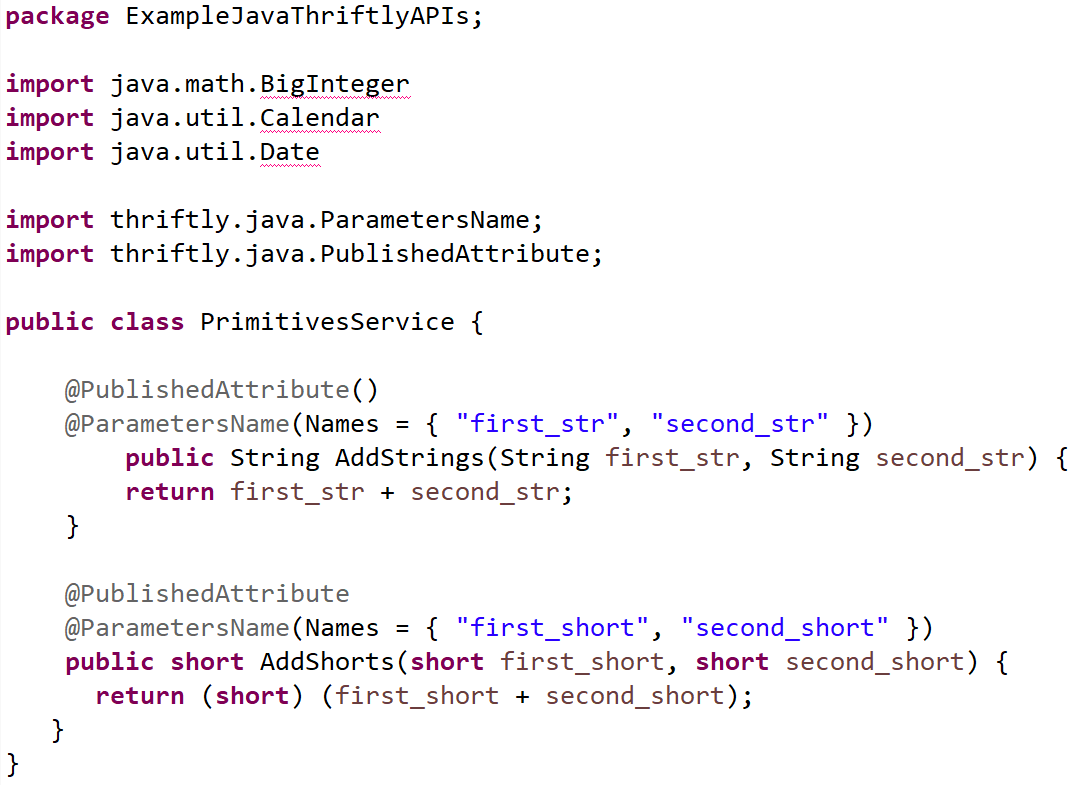
The first service you create will operate on primitive data types and include functions that return a string and a short. To create this service:
From the Package Explorer sidebar, right-click your project and select New > Class. The New Java Class window appears.
In the Name: field, enter PrimitivesService. Then, select Finish. PrimitivesService.java appears in Eclipse.
Modify the default code to read as shown below. Again, note how the code imports and uses the @PublishedAttribute and @ParametersName attributes to specify what functions are included in your API, as well as the names Thriftly assigns to those functions’ parameters:
Save (File > Save) the service.
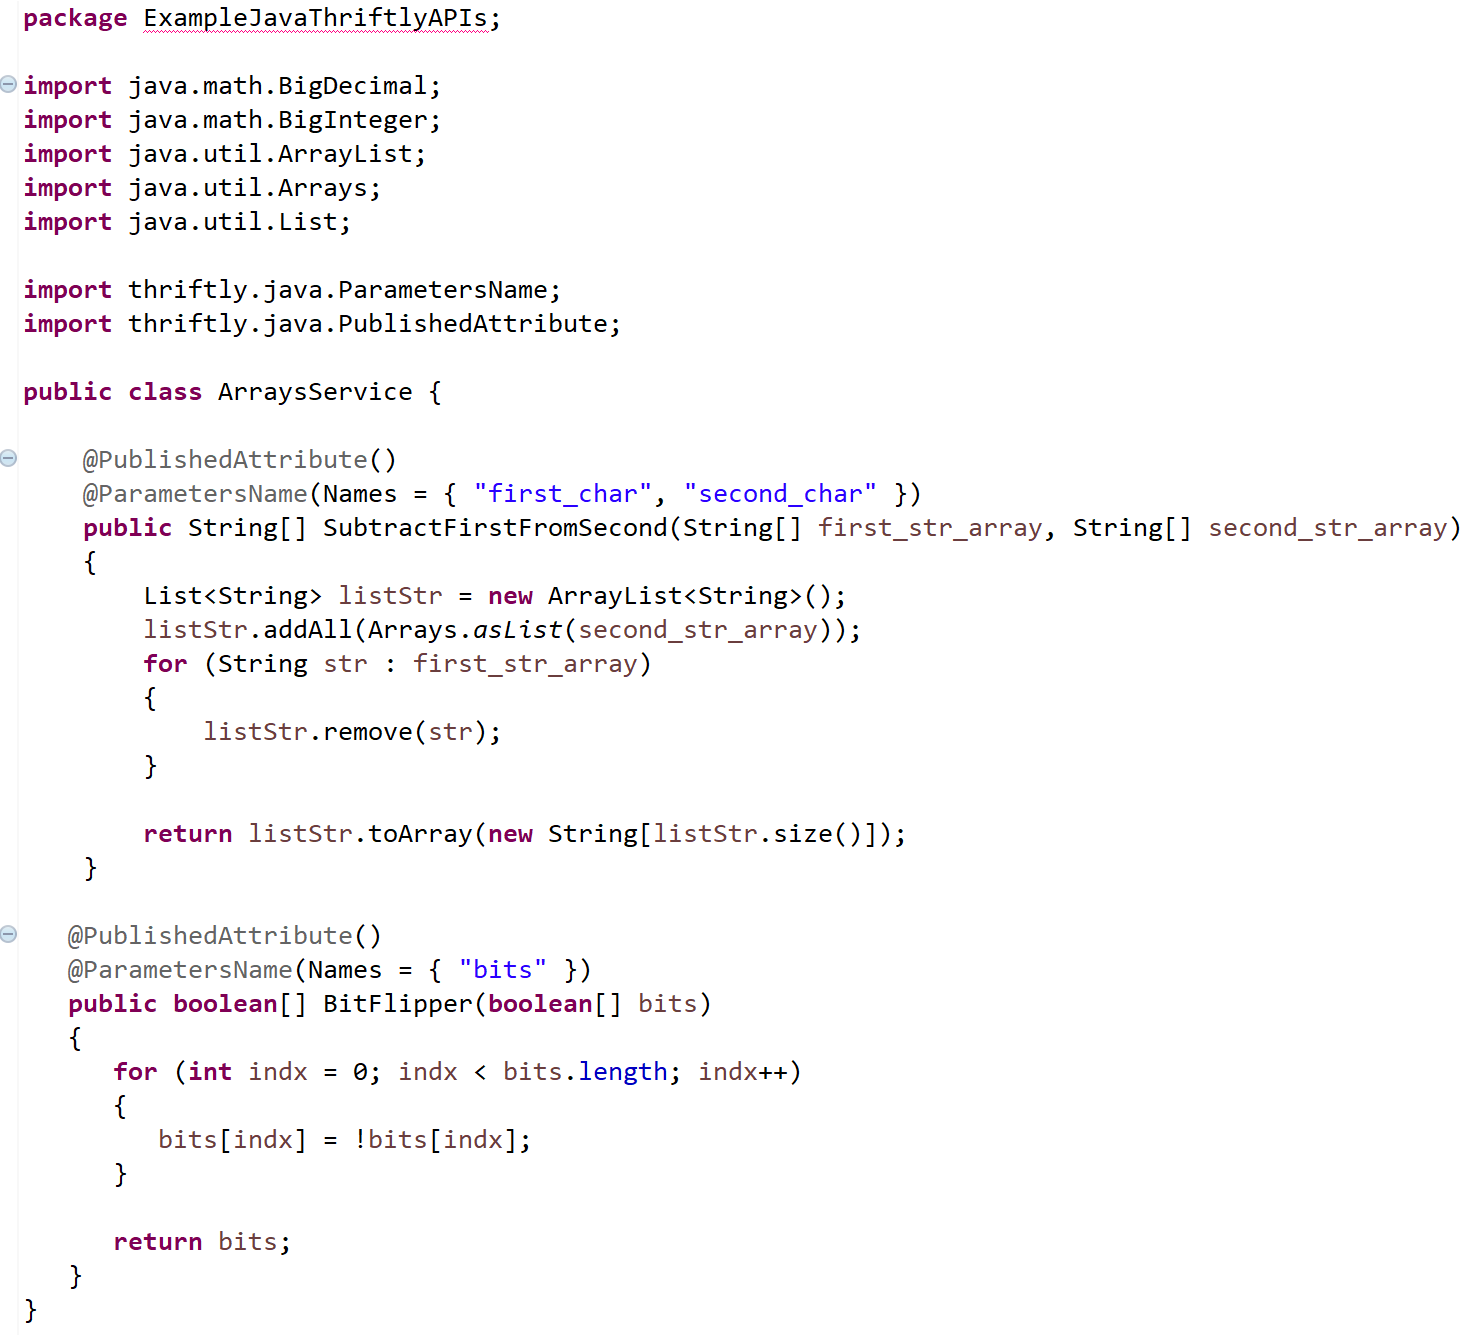
The second service you create will operate on arrays and include functions that return a list and a boolean value. To create this service:
From the Package Explorer sidebar, right-click your project and select New > Class. The New Java Class window appears.
In the Name: field, enter ArraysService. Then select Finish. ArraysService.java appears in Eclipse.
Modify the default code to read as shown below. Again, note how the code imports and uses @PublishedAttribute and @ParametersName:
Save (File > Save) the service.
Running Your New Application and Testing Your APIs
Play around with your new application a bit to see how the APIs you created work.
Select and open your project’s Main.java file (by selecting it from within either the main Eclipse workspace or the Package Explorer sidebar).
From the Eclipse toolbar, select the Run button.
When you run your application, the Thriftly Developer window appears. This window allows you to start configuring and testing your APIs. To take the APIs you just created out for a test drive, refer to the Testing Your Thriftly API section.