Adding Endpoints
After you’ve added your application within the Thriftly Configurator, you must add API endpoints for that application. Endpoints allow you and your application developers to access the Thriftly APIs embedded in your application, using the Thriftly Server and Gateway.
To get started:
If you haven’t already, open the Thriftly Configurator (Windows Start menu > Thriftly Deployment Server > Thriftly Admin).
Select your application from the Thriftly Configurator sidebar.
Select the Add Endpoint button. Your new endpoint appears in the Configurator sidebar, and several endpoint-related fields appear in the Configurator.
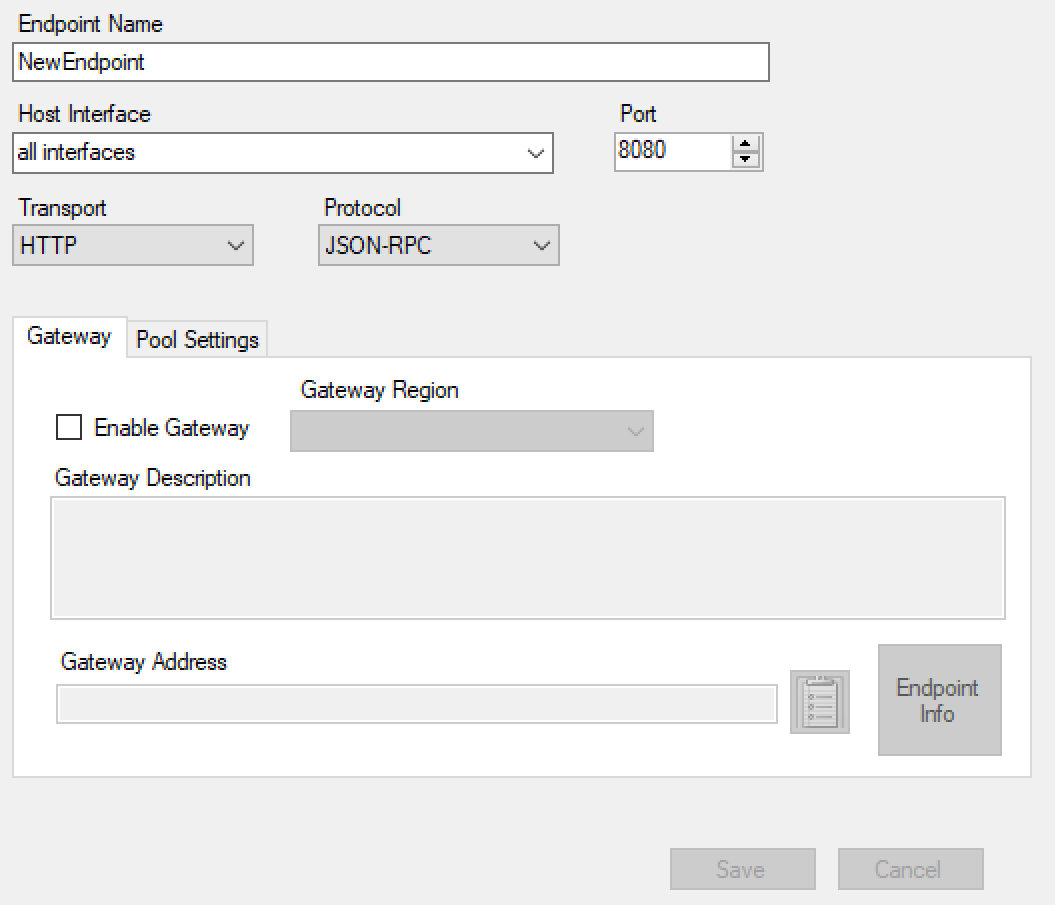
Fill in the following fields for your endpoint:
In the Endpoint Name field, enter a name for your new endpoint.
In the Host Interface field, you can select what source(s) your API accepts requests from:
If you want your API to accept requests from all sources, leave this field set to all interfaces.
If you want your API to accept requests only from your Thriftly Deployment machine, select localhost.
If you want your API to accept requests only from your current IP address, select that IP address.
Optionally, you can enter any other IP address or host name as freetext to use that address or name as the host your API accepts requests from. We expect you’ll use this option sparingly, if at all.
In the Port field, select a port to open for your new endpoint. You must select a unique port for each endpoint you add within Thriftly. For example, if you are already using port 8080 for a previously-added endpoint, you cannot assign this endpoint to port 8080.
In the Transport field, select the transport method your API uses by default. While your application developers can manually transform your API’s transport method, by specifying their desired transport within their API calls’ request headers, your API will use the default method you select here if no transport is assigned within a call’s request header. As a result, you should select the transport method your application developers are most likely to want to use when calling your API from within new applications.
If you plan to use your API as a gRPC service, you must select GRPC in this field (and PROTOBUF in the Protocol field). You cannot manually transform your API into a gRPC service after deployment.
In the Protocol field, select the protocol your API uses by default. Like transports, this protocol is only the protocol your APIs use by default. Your application developers can manually transform this protocol using request headers within individual calls. Select the protocol your application developers are most likely to want to use when calling your API from new applications.
If you plan to use your API as a gRPC service, you must select PROTOBUF in this field (and GRPC in the Transport field). You cannot manually transform your API into a gRPC service after deployment.
Go to the Gateway tab and fill in the following fields:
Select the Enable Gateway checkbox to designate that this endpoint will be served over the Thriftly Gateway. This enables the Gateway Region, Gateway Description, and Gateway Address fields.
In the Gateway Region field, select the region located geographically closest to your Thriftly Deployment machine. For example, if you are deploying your application using a machine located in the United States, select Texas Gateway 1. Selecting the region closest to your deployment machine provides the best API performance.
In the Gateway Description field, enter a description for this endpoint. This description will appear at your endpoint’s web address.
The Gateway Address field contains the URL you and your developers will use to access your APIs after you run your application (later in these setup steps). Note this address for future use; you’ll want to provide it to your application developers (as detailed in the Helping Developers Integrate Deployed APIs Into New Applications section).
Switch to the Pool Settings tab and note the following fields (which in most cases, you should not make changes to):
In the Pool Mode field, you can select whether the Thriftly Server provides each client that connects with your API with its own thread. By default, we’ve set this field to THRIFT NONBLOCKING so the server can handle many concurrent connections with a small number of threads. You might want to set this field to THRIFT THREADPOOL if you determine that each client connecting with your API needs its own dedicated server thread.
In the Non Blocking IO Threads field, you can select how many concurrent I/O threads the Thriftly Server uses if you’ve set the Pool Mode field to THRIFT NONBLOCKING. In most cases, we recommend leaving this field set to 10 so the Thriftly Servers uses up to 10 concurrent I/O threads.
In the Max Request Size field, you can adjust the maximum size (in bytes) of the request packets the Thriftly Server accepts for your API. In most cases, we expect the default maximum size of 10485760 bytes (10 MB) will suffice.
Select Save.
Repeat steps 2-7 for any other endpoints you’d like to add for your application. Then, move on to the Running Your Application and Viewing Your Endpoints on the Web section to run your application and access your endpoints on the internet.